REVIEW OF PRODUCTS USED IN MY ONE ROOM CHALLENGE MASTER BATHROOM RENOVATION
Heads up: I use affiliate links for my fave products. If you click and purchase, I may receive a small commission at no extra cost to you.
It's been about 2 weeks since I've reclaimed my master bedroom suite...hallelujah! I cannot express what a relief it is to sleep in my own bed and walk on carpet without dusty carpet mask on it and just be in my house without someone working in my personal space. It's those little things you take for granted, although I really don't take it for granted. In this post, I wanted to take some time to review some of the products used in my recent master bathroom renovation. I appreciate all the sponsors of this One Room Challenge project, but also want to be honest about my opinion after using these products on a daily basis for the past 2 weeks or so.
FIBERGLASS BATHTUB
Pros: I love that it is easy to clean, that it is deeper than the previous tub so if you actually wanted to take a bath, you can actually be submerged in water. I'm not a bath person, but my daughter was very anxious to give it a try and she loved it. I also bought her a very comfortable bath pillow which made the experience that much more luxe!
Cons: Since it is a deep tub at 20"H, I had to get used to stepping up higher to get into the tub. I hit my knee a few times initially. It doesn't seem to be a problem exiting, just entering. I'm 5'2.5" tall so this is a stretch for me. I probably wouldn't recommend it for bathrooms that someone who is elderly would use on a regular basis. I do recommend it for families with young children because the tub is tall enough to contain the water splashes. I think the part that bugs me the most is the grout connection between the tub deck and the bottom line of tile. Every time I use the shower, pieces of grout is coming out which I understand is normal because fiberglass flexes. I ordered caulk in the same color as the grout and just need to apply it which should fix this issue ...or so I'm told.
THE SHOWER SYSTEM
I was very excited to try this shower system for myself since I've been recommending it to my clients for several years now and have basically installed them in nearly every single bathroom renovation. I had 3 installed in one house alone! This did not disappoint. The shower system retrofits into your existing plumbing. You will need to take into account the clearance space in the ceiling depending on the style you choose. There was a project that this didn't work in because the original shower head was already pretty high and there was not enough room for the rain shower head. It includes a handheld shower head which is an absolute must if you want to clean yourself and the shower space. The slide bar allows you to move the handheld shower up or down to suit your height needs. The rain shower head is a fabulous luxury that would normally cost you thousands of dollars in other shower systems. I know because in my last house I had a luxury shower system installed during the remodel and it was exponentially more expensive. Don't hesitate, this is a must!
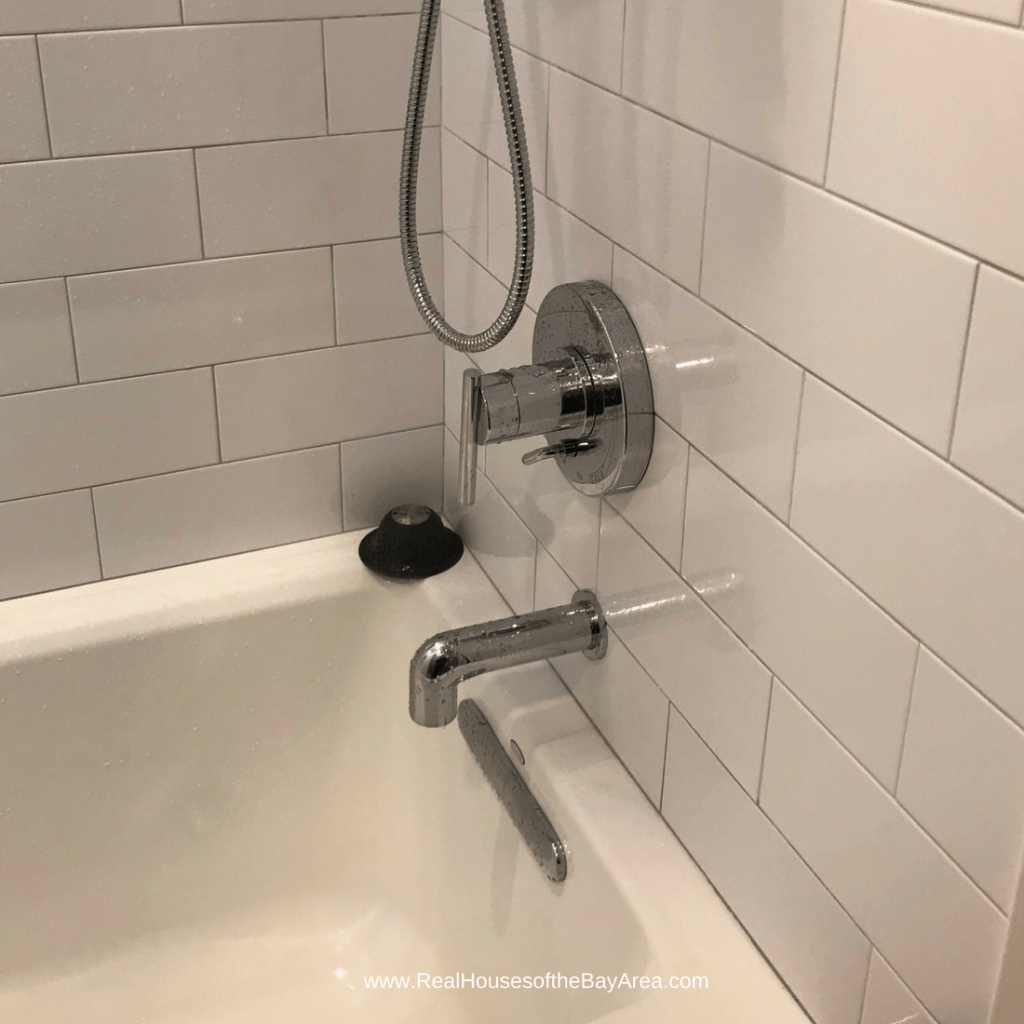
SHOWER VALVE WITH DIVERTER AND TUB SPOUT
I love the clean lines of this shower fixture and how it functions. The diverter on the valve is inconspicuous and so easy to use. Turn it one direction for the water to flow to the tub spout and turn it the other direction to operate the shower system. My old system was old...the tub spout had a diverter that you lifted to operate the shower head, but no matter what, I always had to release the water build up from the shower when I was done. Also, the screw holding the pull out knob would regularly loosen up and I'd have to tighten it up again. So glad to be rid of that task!
TOILET
Pros: love the one piece and the aesthetics of the concealed trapway style. This was an absolute must for me when choosing a toilet.
Cons: It's an ergo height which is 17"H versus a comfort height toilet which is 16"H and a regular toilet is only about 14"H. Those extra inches make a difference, especially when you're only 5'2.5" tall.
FLOATING VANITY
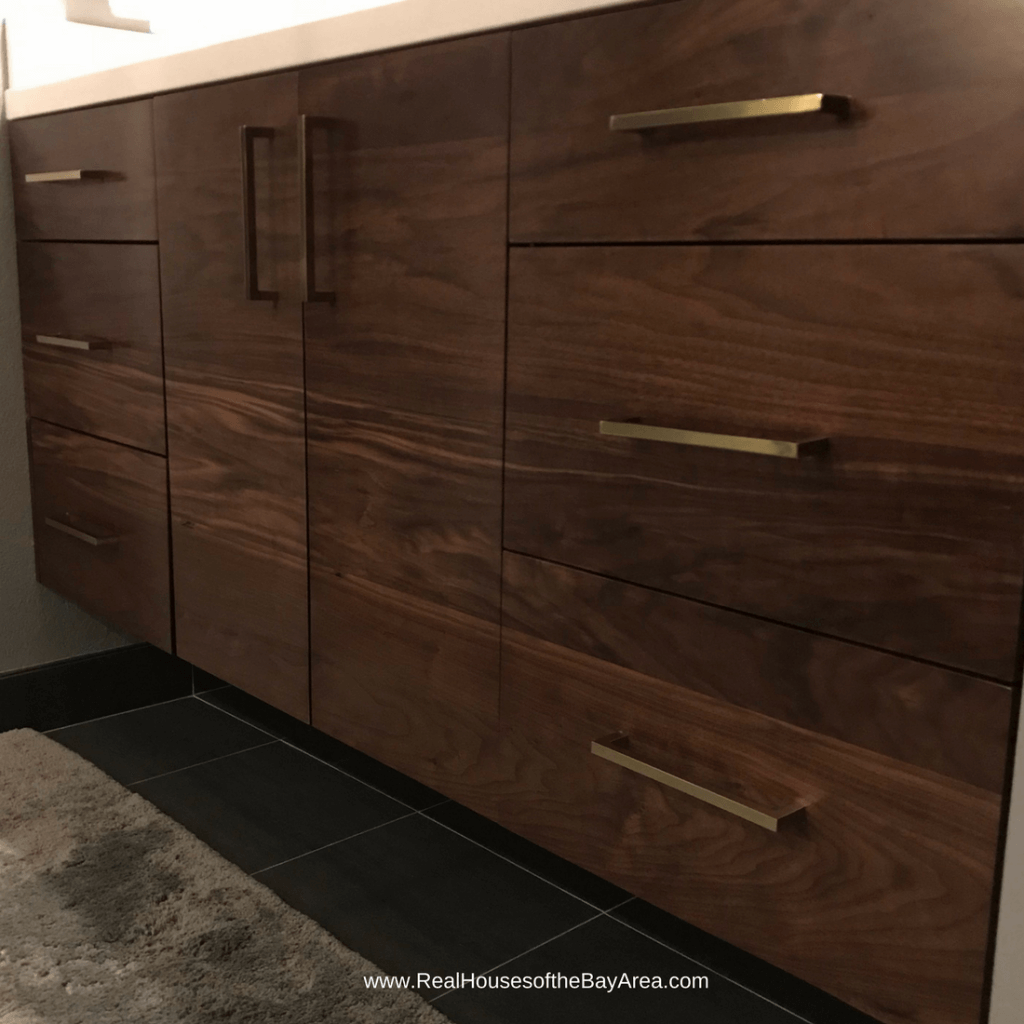
Pros: I love the look. The solid walnut wood really warms up the other elements which can be quite cold - the charcoal tile floors and the dark gray walls and the dark floral wallpaper.
Cons: We were rushing to meet deadlines and the cabinet was taking longer than expected to be made so I had my tile guy set the tile on the backwall at 10" off the ground since the cabinet's finished height would be at 36". The cabinet itself was suppose to be 26"H, it ended up being 26.5"H, plus countertop, it's closer to 27"H. Again, at 5.2.5" tall, it would have been nicer to have the finished height a little lower, maybe at 35.5"H, but then there would not be much "floating" which defeats the purpose. It's fine. It's not uncomfortably high, but it could have been better. Also, the cabinet maker made an error and created the vanity at 24"D (kitchen cabinet depth) rather than 21"D (standard bathroom cabinet depth). It works in my bathroom since I have walls on either side of the cabinet and this gives me more storage space, BUT if this was in a bathroom that had open ends, it would look odd. We also ran into some challenges with the full overlay drawers. I'll go into detail about that in a video tour of the room makeover.
DARK COLORS
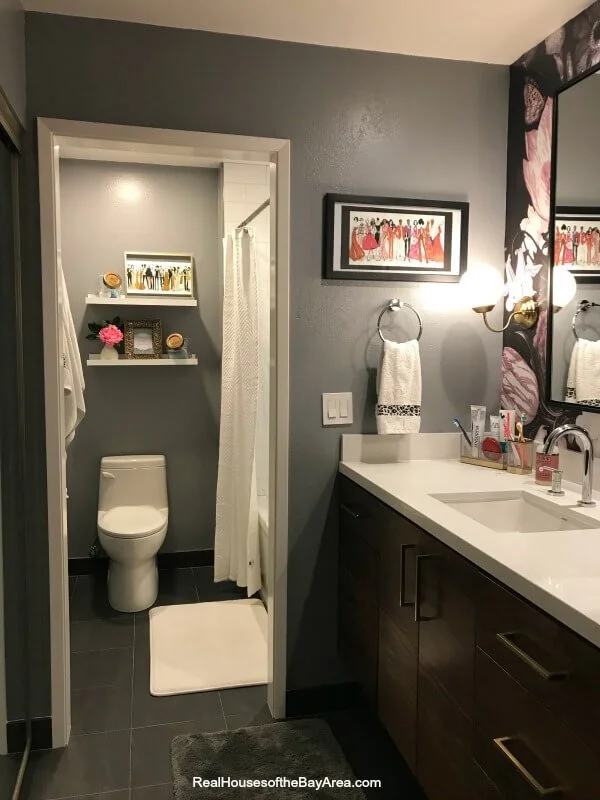
Pros: The space is very moody and chic, like a sophisticated boutique hotel. I love the dimmers on the lighting and that the walls are a similar shade to the floors and the dark floral wallpaper. It is so sexy.
Cons: Since the vanity area is in a bit of a cave zone meaning there's no natural light except from the bedroom side and a little bit from the window in the shower area, it's dark. I had actually considered painting the ceilings the same color as the walls but my contractor talked me out of it and I'm glad I listened. It would have been really dark if I did that. If I could make one change, it would be to add another recessed light to the ceiling between the closet and the vanity. There's one light above the sink, but it could use another light in the walk way to help brighten things up when needed.
WALLPAPER
Pros: It is relatively easy to install. I installed it with my 12 year old who actually did most of the work. I love the pop of color and pizzazz it adds to the vanity area. I'll take removable wallpaper over traditional wallpaper any day. It's less laborious to remove and change when you're ready to move on. Anyone who's ever removed wallpaper will totally appreciate and understand.
Cons: The paper is having a hard time sticking to the wall. It's actually falling off the wall which is frustrating. I took a video and sent it to the manufacturer and they are remaking it for me with a stickier back. Cross your fingers it works better. Again, I cannot express how thrilled I am with the results. I hope you found this helpful when you're choosing materials for your own bathroom makeover. If you missed the post with all the details and the full reveal of this bathroom renovation, go see it here.
Subscribe to the Behind the Renovation Design Journal
Sign up to receive the latest home renovation tips, resources, and inspiration!
RELATED POSTS


